Sunday, December 31, 2006

HAPPY NEW YEAR!!


From Our Family to Yours: Thank You for A Wonderful Year and Looking Forward to Another Wonderful Year With All of Our Customers and to Meeting New People!

Bob and Pat Tomaskovic
GoCeilingMedallion.com

Sunday, December 24, 2006

MERRY CHRISTMAS!!


To All of our Families and our Friends, And to all our Customers and Readers

We here at GoCeilingMedallion.com want to wish you and Yours

Warmest Wishes and Merry Christmas!!


Monday, December 18, 2006

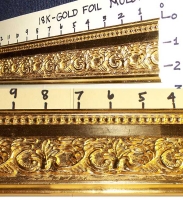
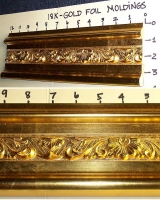
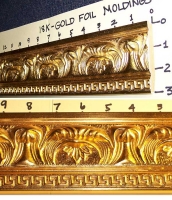
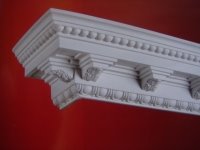
18K Gold Leaf Crown Molding


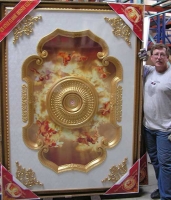
GoCeilingMedallion recently attained dealer status with RoJico Trading Company. RoJico is the exclusive impoter of an elegant new line of ceiling medallions offered by GoCeilingMedallion. We also have access to twenty unique designs of 18K Gold Leaf crown molding like that pictured above. Because we will be working directly with the manufacturer/importer, we can purchase a wide selection of high caliber products at reduced prices that we have passed on to our customer.

The crown moldings are manufactured from MDF and plaster, over which an 18K gold foil is applied. These crown moldings are installed just as any other type would be installed. They can be cut, sanded and nailed. They also come with a sheet of 18K gold foil for touching up.

Use these crown coldings to create dramatic and elegant effects in your home. Click here for more examples of our new line of 18K Gold Leaf crown molding and to place your order today.

Sunday, December 17, 2006

GoCeilingMedallion.com Registered Dealer of Rojico Trading Company Products

FOR IMMEDIATE RELEASE

Mesquite, NV December 17, 2006--GoCeilingMedallion.com has recently attained status as a registered dealer with Rojico Trading Company, a direct manufacturer and importer of many quality decorative architectural products. Rojico is the exclusive importer of a unique line of ornate ceiling medallions now offered by GoCeilingMedallion.com.

Rojico ships from ports in both China and India. This gives them access to a wider collection of quality products. "We manufacture, import, and distribute a wide variety of product lines to the trade, which includes builders, architects, designers and many retailers. Rojico trade accounts have access to a wide range of wholesale products," stated Rojico Marketing Director, Jim Welch.

"The patronage of our customers has allowed us to slash prices and add products like the new Elegant Series ceiling medallions and 18K Gold Leaf crown moldings to our growing catalog at GoCeilingMedallion.com," affirms Bob Tomaskovic, Product Manager at GoCeilingMedallion.com.

"By working directly with the exclusive U.S. importer, we can purchase a wide selection of high caliber designer architectural items at reduced prices, which we can then pass on to our customers," Bob reports. He goes on to say that "we currently have access to about 150 ornate patterns of ceiling medallions in our Elegant Series and approximately twenty unique designs of 18K Gold Leaf crown molding."

The Elegant Series ceiling medallions are molded and assembled using a combination of modern polymers- molded pvc, vinyl, acrylic, and plastic materials, with a flat wood backing. This type of construction allows for the creation of a strong, yet lightweight product with vibrant colors, that resists warping and aging, and remains easy to care for.

What used to take a team of skilled artisans a week or more on site to create a ceiling feature as elaborate and detailed as our Elegant Series ceiling medallions, can now be achieved in a fraction of the time at significant savings in labor costs.

The crown moldings are manufactured from MDF and plaster, over which an 18K gold foil is applied. These can be cut, sanded or nailed. They are essentially installed as any other type of crown molding would be installed.

"We are very excited about our new dealer status with Rojico. The ceiling medallions are truly beautiful and so elegant. I love the gold leaf crown moldings, too. They are not for everyone, but if you have a flair for the luxurious, then these architectural details are definitely for you," comments Pat Tomaskovic, President of GoCeilingMedallion.com.

###


Patricia Tomaskovic is President and CEO of GoCeilingMedallion.com. For more information, you may contact us at: sales@goceilingmedallion.com.

Monday, December 11, 2006

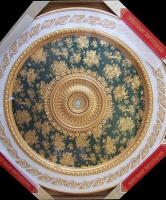
Elegant Series Ceiling Medallions Added to Online Catalog at GoCeilingMedallion.com


GoCeilingMedallion.com is excited to offer a series of Elegant ceiling medallions that feature bold designs, vibrant colors and classic decorative themes. We are also able to offer Free Shipping on all Elegant series medallions.

It used to take a team of skilled artisans a week or more on-site to create a ceiling feature as elaborate and detailed as our Elegant Series ceiling medallions. Our Elegant Series allows you to achieve the same effect in a fraction of the time without the need to hire specialized artisans resulting in a significant savings in labor costs.

Elegant Series ceiling medallions are molded and assembled using a combination of modern polymers - molded pvc, vinyl, acrylic, and plastic materials, with a flat wood backing. This method of construction allows for the creation of a strong, light weight ceiling medallion with vibrant colors that is difficult to deform, resists warping and aging, and can be easily washed. Because they come fully assembled, they are very easy to install. Their relatively low profile (ranges from 2.5" to 4") makes them suitable for fairly low ceilings. They come in several shapes with dimensions from 37" up to 102" in size.

By working directly with the exclusive US importer we are able to offer our customers the best possible prices on these fantastic and elegant ceiling medallions.

GoCeilingMedallion.com is currently able to offer roughly 150 standard patterns of Elegant Series ceiling medallions and will be working to get them all into our online catalog as quickly as possible. For information on other available size/color combinations please Contact Us at sales@goceilingmedallion.com. We are always happy to help our customers find what they need.

Saturday, November 25, 2006

An Introduction to Decorative Molding

Decorative molding includes all of the kinds of trim used in a home. It can serve a purely decorative function, or it can also be used to hide any unfinished edges of a wall. Moldings can be made of wood-most usually of pine or oak-or, as is used frequently today, polyurethane. Polyurethane is a lightweight, long-lasting, durable alternative to wood. Molding can also be painted or stained.

This article provides a brief description of the types of decorative trim available as well as information available to guide you in your use of decorative molding in your home.

5 types of molding
There are five types of decorative molding commonly used. These include: baseboard, cornice, crown, wall moldings, and panel moldings. Let's take a look at each one separately.

Base. Base molding is the trim used to finish the wall along the floor. Also called a mopboard, the baseboard protects the wall. Ideally, your baseboard complements the casings around your doors and windows. A baseboard is commonly found throughout every room in most homes.

Cornice. The cornice is the decorative molding placed along the top of the wall. Cornice can be built up using many pieces of trim. Cornice is a more ornate version of crown molding. Ornamentation includes acanthus leaf, egg and dart, modillions, or dentil among many others.

Crown. Crown molding is also used along the top of the wall. Also called bed moldings, they are installed at an angle to adjunct surfaces. Crown molding is also used to finish cabinets, built-ins, and fireplaces. Cove molding, a rounded piece of trim at the juncture of the wall with the ceiling, provides yet another means of transition from the wall to the ceiling.

Both crown and cornice moldings have been around as long as the use of plastered ceilings has been. Cornice and crown moldings usually reflected the type or intended use of the room. For example, reception rooms were often decorated with more ornate cornice moldings, while plainer crown molding was often installed in the more functional areas of the home, such as the kitchen.

Wall moldings. This group includes the chair rails, and the less common picture rails and friezes. Chair rails are popular features and so can be found throughout many homes. It is the molding that sits approximately 30"-36" above the floor, right at about the height of a chairback. If you choose to panel the wall below, this trim is known as a dado cap.

Picture rails and friezes are often confused, while in actuality they are two separate entities, although the difference is slight. A picture rail has a rounded top edge protruding out from the wall, where hooks are often placed. Its main purpose is for hanging pictures. A frieze, on the other hand, is a flat molding, frequently decorated with relief carving or classical profile.

The picture rail or frieze and the chair rail form what is known in the Victorian architectural style as a tripartite. The wall is effectively broken up into three separate areas. This type of wall treatment extends your options for decorating considerably.

Panel molding. Panel molding is used to break large surfaces up into panels. Panel molding is normally found on doors, but can also be used to decorate walls and ceilings. Fairly easy to install for the average do-it-yourself homeowner, panel molding can be used to create a custom look. Panels can be used in creative ways utilizing such features as size, curves, and decorative corners. Little details may be slipped inside to create an even more elegant look.

Tips to Guide the Use of Decorative Moldings

Your use may be determined by a number of factors including the architectural style of your home, as well as your personal taste in design styles. Be sure that the size and scale of the trim is appropriate for the room to which you will be adding this type of ornamentation. If you choose to paint your moldings, keep in mind that contrasting colors can add a more "dynamic" element to your room. You may consider coordinating moldings with each other as well as with other design elements present in the room.

Synthetic polymer, or polyurethane, is a natural choice for molding today. As it is lightweight, it is easy to cut and install. Polymer is a more economically feasible choice if you opt for more elaborate decorative moldings. Moldings are also flexible, allowing the homeowner to trim curves and rounded areas of the home. When utilizing cornice and crown moldings, you can combine various types to create a more personal statement. However, this can be more challenging to install for the individual. Corner blocks are available as well in polymer. These can be useful in eliminating difficult corner cuts.

Now you are aware of many further options. Don't be intimidated. Installation instructions and informative articles like this one abound on the internet. Do your homework and investigate all of your available options. This is something that you will have to live with, so it should reflect your tastes. They will certainly set the decorative tone of any home. Good luck to you as you begin to use decorative moldings to create your wonderful space.

Visit GoCeilingMedallion for 100's of options to assist you in building the decorative home of your dreams.

Thursday, November 16, 2006

Show Us Yours..............Your Ceiling That Is

The American dictionary defines a ceiling as "the undersurface of the top of the room". However, I recently read a much better definition of a ceiling as being the "crowning glory of a room". I think many people look at ceilings as being merely functional: a great place to hide wiring and other mechanical systems. We spend a good deal of money remodeling our homes. We put in new bathrooms and new cabinets in our kitchens. We retile our floors. All of these things we do in the hopes of increasing the value of our homes. Some of these endeavors cost us a great deal of money.

So what can we do with our ceilings? It turns out there are many things we can do and for a lot less than some of the examples above. It's about time to put our ceilings on display. There are several types of ceilings that can be found throughout our homes, providing options during new construction or remodeling. There are also several further decorative options available should we choose to further adorn our ceilings. This article will focus specifically on the common types of ceilings .

Plain Flat Ceilings

The simple plain type of ceiling is usually constructed of flat plaster or Sheetrock. This type of ceiling is ideal for various decorative techniques, such as textured plaster and raised patterns. Decorative moldings and ceiling medallions can also be added. You can buy moldings and ceiling medallions plain and then paint them or you can purchase them custom painted.

Vaulted Ceilings

The vaulted ceiling is constructed on the principle of the arch. Vaulted ceilings are usually round, or barrel-shaped, and painted as would be found in a Gothic church. A groin vault where two barrels intersect perpendicularly is another type of vaulted ceiling. This type of ceiling was developed by the Romans but remains popular today.

Cathedral Ceilings

A cathedral ceiling is a pointed ceiling with two sloping sides. Cathedral ceilings open up the space in your home. They add grandeur to large spaces.

Ceiling Domes

Ceiling domes are bowl-shaped rounded ceilings. Rotundas, often seen in State Capital buildings, are ceiling domes of great magnitude. Domes can be flat and dish-shaped or they can be deep and high. Ceiling domes draw the eye upward creating an expansive feeling. Shallow recessed domes used in an entryway or dining area can create a space of great dignity and elegance.

Beamed Ceilings

Beamed ceilings expose rafters and trusses in a decorative way. Beamed ceilings can create a rustic feel to your home. You have the option of the simple, rough-hewn look or you can create rich carvings that you paint.

Coffered Ceilings

Coffered ceilings are boxes constructed in the recesses between the beams and cross-beams of your ceiling. In architecture, a coffer is a sunken panel in the shape of a square, rectangle, or octagon that serves as a decorative device . an example of this can be found in the ceiling of the rotunda dome in the roman pantheon (http://en.wikipedia.org/wiki/Coffer).

Coved Ceiling

Coved ceilings are formed with a curved radius or a straight angle where the wall meets the ceiling. The absence of sharp right angles softens the effect of each room where it is used.

This article covered the types of ceilings commonly found throughout homes built throughout the world. There are numerous other decorative ideas in addition, that will further enhance the beauty of any room. You can add dimension, depth and history. You can create an atmosphere that says this is who I am. We'll talk about other decorative ideas and features another time, so keep coming back. If you've done something really creative with the ceilings in your home, send me your pics. I'll post them here on my blog with your name. You are proud of your home. Now it's time to show it off! Send them to http://www.goceilingmedallion.com/Contact_Us.html.

Tuesday, October 10, 2006

More notable news

I know it's been a little while since I've posted. We've been working on the website. We have a whole new and fresher look. We think you will really find it a lot easier to navigate and find just what you're looking for. Look for further changes in the future. Keep telling us what you want to see on our website. We appreciate your feedback.

Wednesday, September 13, 2006

4 Questions You Need to Answer Before You Tear Down the Walls

Homeowners embark on do it yourself projects everyday. Sometimes, a problem presents itself that must be repaired immediately, such as a leak. Sometimes, the homeowner wishes to improve the salability of his home and undertakes larger projects, such as an addition to the home or remodeling the kitchen. Then there are those who wish to improve or update the look of their home. Whether it’s an immediate need or a major undertaking, there are many questions to ask yourself prior to initiating any project on your own. Yes, you can save yourself a lot of money by doing your own home improvements, but any project, large or small, requires some pre-planning. The bigger the project, the more planning is involved. After all, you don’t want your project to end up costing twice as much as necessary because you didn’t thoroughly plan for any potential complications.

Whether you’re installing cabinets, building a deck or adding crown molding throughout your home, a comprehensive plan will benefit the homeowner prior to initiating the project. Below are some questions and considerations for the homeowner to ask before tearing down those walls or visiting the local home improvement center.

What is your plan?

What do you hope to accomplish? Are you remodeling or adding a room? Or is it a simple problem that needs attended to immediately? How much do you need or want to spend? Your plan should begin with setting some priorities. Break the project down and rate the importance of each aspect. Decide on expense and speed. Does your project require the best quality or can you cut some corners? For example, do you have to use plaster ornamentation or can you substitute polyurethane? Do you want it done yesterday or is it something with which you should take your time?

Try to determine what your costs will be. Do some homework ahead of time. Obtain bids from contractors and other professionals. This will give you a better idea for what the project entails, whether or not you plan on completing some or all of the work yourself. I like to obtain at least three random bids for any work that I have done. Also, visit the home improvement stores for an idea of the costs for material and other necessities. After doing the research you may decide that the task is too large for you. In any case, you now know how much the job will set you back financially.

Look at setting yourself a timetable for completion of your project. Most projects will end up requiring at least twice as much time as you anticipate. Make allowances for setbacks, for delayed deliveries, for extra work you encounter along the way to completing your original project.

Is this a DIY project?

Be realistic about your do it your self skills. If the undertaking is beyond your abilities, seek professional help. Maybe you need a plumber or an electrician. Are you qualified to handle any unforeseen problems which could develop? Do you know what those potential difficulties are? If you planned ahead, you should have an idea of where you might need to seek assistance for completing some part of your home improvement project. For example, if you are remodeling your kitchen and you are qualified to put in the cabinets, but you cannot rewire the electrical lines. Then you would plan for an electrician to come in and complete this aspect of the job. Also, some cities or counties require professionals to do some types of work. For example, in the Fort Lauderdale area, a homeowner may replace the roof, but only the pitched part. If you have any part of your roof that is flat, it must be repaired only by a licensed professional. This is another aspect where doing your homework can save you time and money in the long run.

Should you hire a professional?

If you do decide that your home improvement job is beyond your abilities or if the job will require a professional, then investigate thoroughly. The news is full of stories of people being scammed by unethical contractors or just folks pretending to be a contractor. Get some recommendations from your family and friends. This is also where those bids you obtained will come in handy. Be wary of those bids that are extremely high or extremely low. Chances are that you are either paying too much or perhaps you will get what you paid for in the case of a lowball figure. Ask for references from the contractor.

Do you need a building permit?

You will need to check with your city or county to obtain any required permits depending on the type of work. Find out what work your city requires a professional to complete. Find out about requirements for zoning. Some work will be governed by zoning or setback restrictions. This aspect of home improvement can take some time. Apply in advance of the job so that you have the permit before your projected date to begin the project.

Some final notes

So, you have answered all of the questions and you have done all of your homework. Now you are ready and eager to start your project. Here are some final considerations to help the job go smoothly.

Gather the necessary tools and materials.

Assemble all of the necessary materials and tools that you will use ahead of time. Check and double-check to see that you have everything that the job requires. There is nothing more frustrating or time consuming than getting into the project and then to have to stop and run to the hardware store because you ran out of finish nails or your tool kit is missing a saw blade that you need. Some of the tools you may require include: miter saw, drill, nailer, or a router. Have your materials and fixtures nearby or schedule delivery to coincide with your projected date to begin work.

Coordinate the project.

If you are tearing off a roof, order the dumpster ahead of time. Meet with contractors and other professionals as required, for any larger jobs. Schedule deliveries to coordinate with contractors scheduled. It can be a real juggling act for the homeowner.

Personal considerations.

Take frequent breaks from the job as needed, especially if you find yourself becoming overwhelmed. Don’t think of restrictions as hindrances. Consider them helpful in sorting out all of the seemingly limitless possibilities for your home improvement task. Obtain financing ahead of time. You do not want to have everything ready to go with no means of paying for it. Consider the design elements of your home or project. Also consider help with lifting heavy objects. If you physically injure yourself, your job will be postponed until you have recovered. Just something to keep in mind.

You have plenty to consider regarding your DIY project. Remember, this can be fun, if you are prepared. Always remember the end result. Since you have planned for problems all along the way, nothing should come out of left field to bowl you over. Revel in the sense of accomplishment when your project, no matter how large or how small, is completed. Good luck!

Monday, September 04, 2006

Tips For Easier Wallpaper Removal

Wallpaper removal is easy. Well, maybe it’s not really easy, but I have good news for you. Yes, stripping wallpaper is messy and it is time consuming. You would rather do almost anything else. As a professional, my clients have often told me that if not for the wallpaper removal, they would have decorated the room themselves. It is such a deterrent.

While it is a hassle to remove, most people’s real fears center around damaging the wall while stripping the paper. It’s true. You can. I’ve spent as much time repairing that damage. There is no reason that it has to happen, though. Once you understand what is really happening below the surface, wallpaper removal becomes quite simple. Let me talk you through it.

First, KNOW that this is going to be a messy job. There is no way around that. Bits and pieces of wet paper, covered in adhesive, will end up stuck to everything that’s not covered. Fortunately, it cleans up easily with some soap and water.

We can minimize the extent of the mess, though, by taking the time to place an inexpensive plastic drop cloth over the furniture. Lay a rubber backed runner along the wall. Remove everything hanging on the wall and make sure that the furniture has been moved back from the wall by at least three feet.

Okay, now that we have prepped our work area, what’s next? We need to discover what “group” we’re in. To do this, start by finding an edge and attempt to peel the paper off. Here’s where we either sink or swim. Some of the heavy vinyl and fabric wall coverings will just peel right off.

Others will split, leaving a layer of plain paper on the wall. What happens then is that when you try to tear off that layer, it comes off in small pieces. A lot of specialty papers and papers that have been painted over fall into this group. There is a third group that we’ll talk about in a few minutes.

If your wallpaper is in the first group, the wall coverings that just peel right off, enjoy the rest of your day. You got lucky. There are different strategies we can use for the other two groups that will save you both time and money.

Now, for the other 99% of us, there are a number of different products on the market that we could use to remove the wallpaper. I have tried them all. Save your money. All we really need is warm water.

Start by peeling off that top layer of paper. What’s left on the wall will be a layer of plain paper and adhesive. Apply the water to the paper with a sponge, squirt bottle, garden sprayer or whatever you have handy that will accomplish the job. Use just enough to saturate the paper without water running down the wall and making a mess.

Now for the really big secret to wallpaper removal: WAIT. That’s right, wait. Moisten the area again and wait some more. It normally takes about 20 to 30 minutes for the saturated paper to completely soften the adhesive beneath.

Next, use a 6” broad knife to remove the paper from the wall. It should come off easily and in long strips. If it does not, remoisten the paper and wait a few more minutes. Let the water do all the hard work! By wetting the wall ahead of where you are working, it is possible to move steadily around the room once you get started.

Now, about that last group. You’ve watered and waited and watered and waited. Frankly, this just isn’t working and you’re becoming impatient. The problem is getting enough water to penetrate the surface and completely saturate the core of the wallpaper. There is a solution. We need to break up the water resistant surface coating of the wallpaper without harming the wall.

Now you might be tempted to start gouging at the wallpaper or scraping it roughly. This is not a good idea. This is how you damage the wall. Then you have to spend more money because you have to call a contractor. You are also on his time schedule now.

There are special tools made should you run into this problem. I normally use a 36 grit sanding disc to abrade the surface by hand. NOTE: Using a disc this coarse with a power tool will destroy your wall. Make sure to use it manually only!

Rent a commercial wallpaper steamer. Steam passes through the perforations made by the sanding disc. It is absorbed by the paper and adhesive much quicker than water. Make repeated passes over an area with the steamer until the core of the paper becomes saturated and the adhesive softens. If an area is being particularly stubborn, try going over it again with the 36 grit disc to allow additional steam to penetrate the paper.

Don’t waste your time scraping at areas where the adhesive has not yet softened. I cannot stress enough that this is how walls get damaged. Steam the paper until the adhesive softens. Remove the paper with your 6” broad knife. You should see good results with the steamer.

So wallpaper removal is not always easy, but nobody said that it has to be a painful experience either. Have a wallpaper removal party and invite all your friends. Treat them to dinner afterwards and make it a girls’ day. Or how about a contest with the kids. Always keep a picture in your mind (or on the fridge) of how beautiful the job will turn out. Be proud! Life is too short, so don’t sweat the small stuff. Now, let’s get going!

Stop by http://www.goceilingmedallion.com for all the tools you need.

7 Steps for Easy Elegance: Visually Enhance Any Room with Panel Molding

Panel molding dates back to the Georgian period of the 1700’s. Georgian architecture is characterized by a sense of proportion and balance. Symmetry and adherence to the classical rules were valued as regular and desirable. Today, panel molding is used to break up large surfaces, which adds a formal feeling to most designs. It is also utilized as a border separating colors or textures. Visually enhance any room with decorative panel molding; from walls and doors to ceilings, these exquisite accents can be installed by the average do it yourself home owner.

As with any project, proper safety practices should be used at all times. That includes wearing hearing and eye protection as appropriate. If you need to use a respirator, dust mask or any other tool or equipment, always select the right one for the job.

Planning

When beginning any project, it is important to plan the layout. Establishing a plan keeps the job flowing smoothly. It is perhaps the most important step. Although installing panel molding requires that you have a good drawing that accurately shows the room and the pattern, you won't need to generate detailed blueprints. A pencil sketch on graph paper will do. Be certain that the measurements are accurate. Reference dimensions on the drawing to either the center of the room (or to a ceiling dome or ceiling medallion, etc..) or to the walls. This will depend on the dominant feature of your design. Although you may not have any interest in recreating an extravagant baroque ceiling for your own home, you can often find some great pattern ideas by studying the ceilings of historic castles and palaces. Look around your room and decide whether you will have full or split panels; single size or variable sizes, or symmetric sized panels. Panel molding is strictly a decorative element, so there are no rules to follow for the design. This is your opportunity to create a unique and individual design.

Ordering

When ordering your panel molding make sure that the pattern of the molding is compatible with the corners (if you are using corners) and that you have made adequate allowance for cutting waste. Remember to take pattern repeat into account when figuring cutting waste. I like to use a cut list for all trim work. It allows me to plan all of the joints before I start cutting. I use the same list to plan my order. Normally, panel molding is inexpensive due to its small profile. Therefore, you may want to save some work and order enough to eliminate as many joints as possible. You are also going to need adhesive, caulk, etc. to complete the installation.

Prefinishing

If you are not planning to finish (paint or faux finish) the ceiling and the molding at the same, you may want to prefinish the molding and then touch it up after installation.

Assemble Materials

Setup a work area close to the job and assemble your tools and materials. Look over the moldings to make sure they haven't been damaged either on shipping or on the job. Inventory your tools and supplies to ensure that everything you will need is there. If something is missing, stop and get it now rather than waiting until you need it, which inevitably is at the worst possible time.

Layout

Transfer your plan to the ceiling in full size. Layout the outline of the molding rather than the centerlines so the layout will be visible with the molding installed. Remember to reference patterns that surround ceiling domes or ceiling medallions, to the center of the feature they surround. Reference moldings that run parallel to walls to the wall (to minimize the effect of out of square or wavy walls).

Install

Because of their light weight no mechanical fasteners are required. Use an appropriate size bead of adhesive and temporary fasteners as necessary until the adhesive sets.

Finish Up

After the adhesive has set, remove the temporary fasteners or set below surface. Caulk the joint between the ceiling and the molding. Fill the holes made by the fasteners with non-shrink filler, sand, prime and paint.

Voila! Enjoy and relish in the glow of all the compliments you receive when others see how beautiful your room is with the simple addition of panel molding.


copyright 2006 goceilingmedallion.com

How to Efficiently Install Ceiling Medallions

Adding a ceiling medallion is the easiest thing you can do to change the look and feel of any room in your home. Installing small ceiling medallions, up to approximately 24 inches or so, is a simple job for the average home handyman. As long as you are comfortable with changing a light fixture you should have no problem. If you are uncomfortable with removing your fixture take a look at installing a 2-piece ceiling medallion.

Safety is so important we would like to address it briefly. Always follow approved safety practices. Use hearing and eye protection. When you need to use a dust mask or respirator, be sure to use the right one for the job. Last, but not least, when working in electrical boxes, always make sure the power is turned off.

Plan the Installation-Before You Order

This is probably the most neglected step in any installation, but the most important. It is what makes the difference between a quick and efficient installation or massive frustration and numerous interruptions to run to the hardware store. The first step is to select the ceiling medallion you want to use. If you are using it in conjunction with a light fixture or a ceiling fan, you should note whether the ceiling medallion's center hole matches the fixture's trim. If they don't match you will also need to order a ceiling medallion center or a new fixture trim ring. Now is also a good time to see if the lighting fixture hardware is going to be long enough. Check the building code to make sure that there are no conflicts with your installation plans. In case of conflict, always follow local building codes. NOTE: Most building codes require you to leave access to the electrical box. Using a ceiling medallion with a 3.5-4 inch center hole provides this. Permanently mount the ceiling medallion to the ceiling and use either the fixture's trim ring or a removable ceiling medallion center to cover the electrical box. Also, make sure that the existing electrical, plumbing and framing will not interfere with your installation.

Order Materials

Now that you have planned your installation, its time to order your materials. When you order your ceiling medallion, don't forget to order the ceiling medallion center, if you are going to be using one. Order construction adhesive, caulk, fasteners and extra length light fixture hardware. Order your hardware with your ceiling medallion and save yourself a trip to the store.

Assemble Materials

Before you start, assemble all the materials near where you are going to install the ceiling medallion. Double check to see that you have everything you need before you start. Now is the time to prefinish the ceiling medallion if you want to. If you plan on doing anything more than just painting it flat white, prefinishing is recommended.

Remove Existing Fixture

TURN OFF POWER !!! Turn off electrical power at the breaker box and mark the circuit breaker so someone doesn't accidentally turn it on while you are working. Now you can safely remove the existing fixture.

Layout

We recommend having the product on hand to ensure exact measurements. Layout the area on the ceiling where you want to mount your ceiling medallion. For a small ceiling medallion, you should be able to hold it up with one hand while tracing around it with a pencil. Larger ceiling medallions may require an assistant. If you need to orient a round ceiling medallion use a single register mark at the junction of the ceiling/medallion. Mark both pieces. For oval and diamond shaped ceiling medallions, start by drawing centerlines parallel to the walls and 90 degrees apart on the ceiling. Then make register marks 90 degrees apart on the perimeter of the ceiling medallion. Locate and mark ceiling joists on the ceiling and on the medallion if you are using screws to mount (required on all plaster ceiling medallions and also on polyurethane ceiling medallions over 20 inches). Mark and/or protect wiring and plumbing if necessary to avoid fasteners penetrating them during installation.

Drill

Drill and countersink (1/8 inch deep max.) screw holes for mounting screws. Also, drill the center hole or ceiling medallion's center hole if necessary. If you don't have a hole saw of the proper size, polyurethane is easily cut with a razor knife.

Apply Adhesive

Apply adhesive according to the adhesive manufacturer's directions. Small ceiling medallions may be installed using only adhesive. Temporary clamps or fasteners may still be necessary until the adhesive sets.

Fasten

Fasten the ceiling medallion to the ceiling using coated screws in the predrilled countersunk holes. If you are unable to screw directly into the ceiling joists, the use of toggle bolts is permitted. Ceiling medallions over 20 inches in diameter and all plaster ceiling medallions require mechanical fastening.

Finish up

After the adhesive has dried, usually 24 hours, caulk the perimeter ( if needed ). Use no-shrink spackle, joint compound or plaster to patch screw holes. Feather edge or sand repairs and touch up paint. Hang up your fixture and you are done.

One final step: sit back and enjoy the simple beauty you have created.


Copyright 2005. http://www.goceilingmedallion.com

Trend-setting Across America: The New Medieval Architecture

Corbels, or decorative brackets, are one of the most versatile decorative ornaments that can be used to enhance the architectural beauty of any room . Corbels are growing in popularity and can be used just about anywhere. By definition, a corbel is an architectural bracket or projection from a wall. They often support a cornice, or moldings, an arch, or some other type of overhang.

In Medieval architecture, a corbel was the name given to a piece of stone which jutted out from the wall whose purpose was to support any weight lying on top of it. A ‘tassel’ or ‘bragger’ was the name given to a piece of timber extending out from the wall instead. The word corbel actually originates from the Old French and is derived from the Latin corbellus meaning raven, referring to its beak-like feature. Corbels are made from wood, plaster, marble, stone and polyurethane. Corbels are used interiorly as well as on a home’s exterior. Decorative corbels can be used to adorn cabinets, furniture, pilasters, and door panels or as brackets for shelves and mantels.

While Romanesque corbels were often plain in appearance, occasionally they were also carved into heads of humans, animals and other patterns. Sometimes they were carved into imaginary beasts. Structures built during the Early English period were frequently decorated with elaborately carved corbels.

Corbels of great size and beauty, with rich carvings, carried balconies in Italy and France. These were some of the greatest examples of the Italian 16th century style. In England, wooden corbels bearing window-sills or oriel windows flourish. Gothic Revival style homes and buildings are often built with oriel windows.

Corbels occasionally end with a point that looks like it is growing into the wall or forming a knot. These are many times bolstered by angels and other figures. In later periods, carved foliage and other ornamentation was adopted.

Corbelling, which has been used since Neolithic times, is a technique where rows of corbels support a parapet or a projecting wall. Between the supporting corbels of the battlement, was an opening in the floor called a machicolation. Stones, burning objects or hot liquids could be released onto enemies or attackers at the foot of the defensive wall.

Common in Medieval architecture, corbelling later became a decorative feature without the openings of the machicolations. Corbelling which supports upper stories and corner turrets became typical of the Scottish Baronial style during the 18th and early 19th centuries.

Today, decorating with architectural corbels has been adopted by homeowners, interior decorators, builders, millworkers and furniture designers. Use corbels with crown molding to add flair and style to any home restoration project. Create lasting impressions and beautiful architectural designs that reflect anyone’s personal style. Decorative brackets are great accents to use on furniture, walls, as art, or even on the exterior of a home. They truly are setting trends across America!

Ceiling Medallions, Crown Molding, and Ceiling Domes: 3 Ways to Add Elegance and Beauty to Any Room

I want to draw attention to your ceiling. Take a look at it. What do you see up there? Ceilings are an often neglected area of the room when it comes time to redecorate (or repair). There are so many things that you can do too, that are inexpensive, yet provide the simple elegance that speaks to your style. Choose decorative ceiling medallions, crown molding, ceiling domes, rosettes, or panel molding, just to name a few. Three of my favorite ways to accent a ceiling: ceiling medallions, ceiling domes, and crown molding.

One of the easiest and least time-consuming projects is the installation of a ceiling medallion. Although in the past they were made from plaster, today these decorative ornaments are made of lightweight polyurethane foam. This makes them much easier to handle. Ceiling medallions are used to draw attention to chandeliers and light fixtures, or to enhance crown molding. They can also be combined with a rosette and used to decorate an otherwise plain ceiling. You can use these architectural ornaments as wall decorations. Use several small ones in the hallway. Ceiling medallions are versatile and come in many styles and sizes. They can be painted to match any room. Ceiling medallions are one of the most popular architectural details.

Ceiling domes are similar to ceiling medallions in that they can transform any room into a work of art. However, they are larger and actually recessed into the ceiling, necessitating that they be planned for at the time of construction. Ceiling domes effectively enhance a foyer, dining room, living room, or even the bathroom.

Crown molding, also referred to as crown moulding, or cornice, is probably THE most important architectural element used to define any interior space. Most of today’s interior designers agree that every room benefits from the use of crown molding treatment. Crown molding smoothes the transition from wall to ceiling and does much to define the architectural style of a room. The size and style of crown molding used may vary widely, from a simple cove in a farmhouse kitchen to a large built-up cornice in a grand entry.

These are just a few of the architectural designs and accents you can use to enhance the overall experience of all who enter into your home. Just don’t forget the ceiling!

Wednesday, August 30, 2006

Some Interesting Facts

The next time you are washing your hands and complain because the water temperature isn't just how you like it, think about how things used to be. Here are some facts about the 1500s:

These are interesting...

Most people got married in June because they took their yearly bath in May, and still smelled pretty good by June. However, they were starting to smell, so brides carried a bouquet of flowers to hide the body odor. Hence the custom today of carrying a bouquet when getting married.

Baths consisted of a big tub filled with hot water. The man of the house had the privilege of the nice clean water, then all the other sons and men, then the women and finally the children. Last of all the babies. By then the water was so dirty you could actually lose someone in it. Hence the saying, "Don't throw the baby out with the bath water."

Houses had thatched roofs - thick straw - piled high, with no wood underneath. It was the only place for animals to get warm, so all the cats and other small animals (mice, bugs) lived in the roof. When it rained it became slippery and sometimes the animals would slip and off the roof. Hence the saying "It's raining cats and dogs."

There was nothing to stop things from falling into the house. This posed a real problem in the bedroom where bugs and other droppings could mess up your nice clean bed. Hence, a bed with big posts and a sheet hung over the top afforded some protection. That's how canopy beds came into existence.

The floor was dirt. Only the wealthy had something other than dirt. Hence the saying "dirt poor." The wealthy had slate floors that would get slippery in the winter when wet, so they spread thresh (straw) on the floor to help keep their footing. As the winter wore on, they added more thresh until when you opened the door it would all start slipping outside. A piece of wood was placed in the entranceway. Hence the saying a "thresh hold."

(Getting quite an education, aren't you?)

In those old days, they cooked in the kitchen with a big kettle that always hung over the fire. Every day they lit the fire and added things to the pot. They ate mostly vegetables and did not get much meat. They would eat the stew for dinner, leaving leftovers in the pot to get cold overnight and then start over the next day. Sometimes stew had food in it that had been there for quite a while. Hence the rhyme, "Peas porridge hot, peas porridge cold, peas porridge in the pot nine days old."

Sometimes they could obtain pork, which made them feel quite special.
When visitors came over, they would hang up their bacon to show off. It was a sign of wealth that a man could "bring home the bacon." They would cut off a little to share with guests and would all sit around and "chew the fat."

Those with money had plates made of pewter. Food with high acid content caused some of the lead to leach onto the food, causing lead poisoning death. This happened most often with tomatoes, so for the next 400 years or so, tomatoes were considered poisonous.

Bread was divided according to status. Workers got the burnt bottom of the loaf, the family got the middle, and guests got the top, or "upper crust."

Lead cups were used to drink ale or whisky. The combination would sometimes knock the imbibers out for a couple of days. Someone walking along the road would take them for dead and prepare them for burial. They were laid out on the kitchen table for a couple of days and the family would gather around and eat and drink and wait and see if they would wake up. Hence the custom of holding a "wake."

England is old and small and the local folks started running out of places to bury people. So they would dig up coffins and would take the bones to a "bone-house" and reuse the grave. When reopening these coffins, 1 out of 25 coffins were found to have scratch marks on the inside and they realized they had been burying people alive. So they would tie a string on the wrist of the corpse, lead it through the coffin and up through the ground and tie it to a bell. Someone would have to sit out in the graveyard all night (the "graveyard shift") to listen for the bell; thus, someone could be "saved by the
bell" or was considered a "dead ringer."

And that's the truth ... Now, whoever said that History was boring ! ! !

Educate someone ... Share these facts with a friend.

Tuesday, August 29, 2006


Monday, August 28, 2006

Meet Bob

Hi there,

You haven't heard from me yet, but I am the product manager for GoCeilingMedallion.com. My name is Bob and I just wanted to stop by and introduce myself.

I have an ulterior motive though. I wanted to tell you all about my home renovation page. I'm really excited about this page, because it is so full of wonderful information and I just wanted to share it with all of our readers.

About this page:

Think of this as our "home" page for the home renovation area of Goceilingmedallion.com's Resource Center. Originally we thought we could write a single page article that would be useful to most people interested in home renovation. But as we started thinking seriously about it, we realized that home renovation was far too broad a topic to be covered in any useful way in a single article. Luckily, as is often the case, this page took on a life of it's own. Instead of trying to present all of the information on this page or simply providing a list of links we are going to try a little different format. Please let us know what you think of the format.

The sections listed are desinged to give a broad overveiw of each topic with numerous links to specific and detailed information. Additional information on some topics is available in the home decoration area of the resource center. The home renovation area of Goceilingmedallion.com will continue to be a work in progress as we continue to add subjects, content and links. Suggestions for subjects and content are always welcomed.

Thanks for checking out Goceilingmedallion.com's home renovation pages. We hope the information and resources you find here will help you with your project.As always please tell us what you think about this area of our site: comments and suggestions are always welcomed.

Here is the link:

http://www.GoCeilingMedallion.com

I hope to see you there real soon,

Bob

4 Great Reasons to Love On-Line Shopping

More and more people are shopping on-line today than ever before, especially with the holidays coming up fast. We’re looking for gifts for our kids, gifts for our family, and gifts for our friends. But is shopping on-line safe? Is our information secure? Is it convenient? For as many of those who are on-line shoppers (and I am a big on-line shopper myself), there are just as many, or more, who don’t or won’t shop on-line. They cite various reasons for their reluctance. Believe me, it can be scary to try new things. So, I have considered the reasons for their fear and apathy and have come up with what I believe are great reasons you gotta love on-line shopping.

1. Security Issues

Many people are worried about putting their personal information out into “cyberspace”. Personally, I feel safer on-line. Identity theft actually occurs more in the malls and department stores than on-line according to a recent report on CNN. They report that there are far more opportunities available in a mall.

The truth of the matter is that through the process of encryption, the internet is actually a safe place to shop. Encryption is like coding. The only one who knows what is being coded is the one with the key. Secure socket layers, or SSL, is the protocol that most browsers and web servers use to protect our personal information while it is being transmitted. Keys are created with each transaction and then discarded, with each new transaction producing a new, unique key. There are so many combinations possible with 128-bit, for example, that is has been likened to trying to find one particular grain of sand in the Sahara Desert. You can tell that you are using encryption when you see the padlock symbol on the toolbar. And you should see an “s” appear after the http in the address window.

2. Save Money

These days it is a lot easier to save money on the internet. Shipping and handling can get pretty pricey. However, today many of the stores you can shop at on-line are offering some great shipping deals. In some instances, shipping and handling are waived entirely, if you spend a certain amount of money. Many of the book clubs and stores are offering a low fee for S&H, too, when you purchase a specific dollar amount. The price of gas alone is well worth the cost of S&H. And, although the price of gas has come down some, it can still get pretty costly as you run from mall to mall in search of the newest, hottest, gotta have item.

3. Convenience

This one is a biggie for myself. Rather than fight the throng of mad shoppers, I can shop in the comfort of my own home and buy, compare, research anything I want. You can find just about anything on-line, too, no matter how obscure. I also love the fact that I don’t have to beat the traffic to get my shopping done. I don’t have to run from store to store to store to try and purchase the items and gifts I know will please everyone on my holiday list. One stop gift shops are perfect in that you can shop for everyone on your list in one place and still get that special something for each person on your list.

4. Comparison Shopping

There are a number of sites on-line where you can comparison shop and get the best deal. The holidays are about giving. That doesn’t mean you should break the bank in order to do so. Look at sites like froogle.com, yahooshopping.com, or pricegrabber.com to buy at the best prices on-line or even in your area.

There you are. No more reasons not to avail yourself of the convenience and safety of shopping on-line. I hope I have been able to help you become more comfortable in cyber space. You should enjoy your holidays and shopping on-line gives you that extra time to spend with family and good friends. Happy Holidays and Great Wishes to all of you and yours!!


Copyright © 2006
http://www.goceilingmedallion.com

Notable News Bits

85 new UPS shippable Crown Molding patterns just added.

New Ceiling Domes from 29" to 132"

39 new Corbels and Brackets just added.

New benefits for qualified Commercial Customers, including free advertising opportunities.

The Daughter of a Soldier

This is a little off topic, but I received this in my e-mail recently and thought I would share it with our readers.

Last week I was in Atlanta , Georgia attending a conference. While I was in the airport, returning home, I heard several people behind me beginning to clap and cheer. I immediately turned around and witnessed one of the greatest act's of patriotism I have ever seen.

Moving thru the terminal was a group of soldiers in their camo's, as they began heading to their gate everyone (well almost everyone) was abruptly to their feet with their hands waving and cheering. When I saw the soldiers, probably 30-40 of them, being applauded and cheered for it hit me. I'm not alone. I'm not the only red blooded American who still loves this country and supports our troops and their families.

Of course I immediately stopped and began clapping for these young unsung heroes who are putting their lives on the line everyday for us so we can go to school, work and home without fear or reprisal. Just when I thought I could not be more proud of my country or of our service men and women a young girl, not more than 6 or 7 years old, ran up to one of the male soldiers. He kneeled down and said "hi," the little girl then she asked him if he would give something to her daddy for her. The young soldier, he didn't look any older than maybe 22 himself, said he would try and what did she want to give to her daddy. Then suddenly the little girl grabbed the neck of this soldier, gave him the biggest hug she could muster and then kissed him on the cheek.

The mother of the little girl, who said her daughter's name was Courtney, told the young soldier that her husband was a Marine and had been in Iraq for 11 months now. As the mom was explaining how much her daughter, Courtney, missed her father, the young soldier began to tear up. When this temporarily single mom was done explaining her situation, all of the soldiers huddled together for a brief second. Then one of the other servicemen pulled out a military looking walkie-talkie. They started playing with the device and talking back and forth on it.

After about 10-15 seconds of this, the young soldier walked back over to Courtney, bent down and said this to her, "I spoke to your daddy and he told me to give this to you." He then hugged this little girl that he had just met and gave her a kiss on the cheek. He finished by saying "your daddy told me to tell you that he loves you more than anything and he is coming home very soon."

The mom at this point was crying almost uncontrollably and as the young soldier stood to his feet he saluted Courtney and her mom. I was standing no more than 6 feet away from this entire event unfolded. As the soldiers began to leave, heading towards their gate, people resumed their applause. As I stood there applauding and looked around, their were very few dry eyes, including my own. That young soldier in one last act of selflessness, turned around and blew a kiss to Courtney with a tear rolling down his cheek.

We need to remember everyday all of our soldiers and their families and thank God for them and their sacrifices. At the end of the day, it's good to be an American.

Red Friday
Just keeping you "in the loop" so you'll know what's going on in case this takes off.

RED FRIDAYS ----- Very soon, you will see a great many people wearing Red every Friday. The reason? Americans who support our troops used to be called the "silent majority". We are no longer silent, and are voicing our love for God, country and home in record breaking numbers. We are not organized, boisterous or over-bearing. We get no liberal media coverage on TV, to reflect our message or our opinions.

Many Americans, like you, me and all our friends, simply want to recognize that the vast majority of America supports our troops.
Our idea of showing solidarity and support for our troops with dignity and respect starts this Friday -and continues each and every Friday until the troops all come home, sending a deafening message that.. Every red-blooded American who supports our men and women afar will wear something red.

By word of mouth, press, TV -- let's make the United States on every Friday a sea of red much like a homecoming football game in the bleachers.

If every one of us who loves this country will share this with acquaintances, co-workers, friends, and family. It will not be long
before the USA is covered in RED and it will let our troops know the once "silent" majority is on their side more than ever, certainly more than the media lets on.

The first thing a soldier says when asked "What can we do to make things better for you?" is...We need your support and your prayers.

Let's get the word out and lead with class and dignity, by example; and wear something red every Friday.

Thursday, August 17, 2006

“I'd put my money on solar energy… I hope we don't have
to wait ‘til oil and coal run out before we tackle that.”
--Thomas Edison, 1931

FOR IMMEDIATE RELEASE

GoCeilingMedallion.com Teams Up With Superior Building Supplies
Offer New Lower Prices

GoCeilingMedallion.com has entered into a partnership with Superior Building Supplies. Superior offers a line of premium architectural accents, including painted and foil ceiling medallions, moldings of all types and styles and much more. GoCeilingMedallion.com will also offer new lower prices as a result of increased sales.

Mesquite, NV, August 15, 2006—In their ongoing commitment to offer a growing choice of products at reasonable prices to their customers, GoCeilingMedallion.com has entered into a partnership with Superior Building Supplies. Superior offers a line of premium architectural accents, that include painted and foil ceiling medallions, moldings of all types, corbels, corners, domes and much more. Customers will begin to see this new line of products on the GoCeilingMedallion.com website immediately. The full line is expected to be installed within two weeks.

With this new relationship, GoCeilingMedallion.com will be able to offer their customers new lower prices than ever. Superior Building Supplies product’s, made of premium polyurethane, are the best choice economically. They are lightweight, easy to work with and offer an elegant option to more costly plaster or wood.

Superior Building Supplies has more than 20 years of experience in the building materials industry. With offices in the United States, Canada, and Europe, they have access to superior “supplies from around the world that exceed customer expectations for quality, value and service”, as quoted from a representative of Superior Building Supplies.

“We are committed to offering the best to our customers at affordable prices”, says Bob Tomaskovic, product manager at GoCeilingMedallion.com. “We are a small family-owned business, who can appreciate cost savings on products, especially in this economy of today. Where nothing else is certain, our customers can be certain of the fact that we at GoCeilingMedallion.com will always pass our savings on to them. I’d also like to mention that since sales have risen, we are pleased to actually lower prices on several of our existing products in our Century line of architectural accents, as well.”

###

Wednesday, August 09, 2006

GoCeilingMedallion.com to Market Bella Medallions

GoCeilingMedallion.com and Bella Medallions have reached an agreement to distribute a line of hand-painted ceiling medallions.

Mesquite, NV, August 7, 2006—GoCeilingMedallion.com has come to an agreement with Bella Medallions to begin distributing a line of custom hand-painted ceiling medallions. Bella Medallions is a branch of R. L. Williams Gallery, an established art gallery based in North Carolina.

“I am very excited about this agreement. These medallions are literally works of art. Each Bella Medallion is individually hand decorated by a talented artist. It is almost impossible to find this kind of quality today,” remarks Bob Tomaskovic, product manager of GoCeilingMedallion.com.

Bella Medallions creates elegant and beautiful custom hand-painted ceiling medallions. “We are artists perfecting beauty, charm, elegance and unique style in everything we do from our medallions, decorative molding, ornamental pieces and our art work. We are artists who love to create one-of-a-kind pieces of art,” saya a representative of Bella Medallions.

President and CEO of GoCeilingMedallion.com, Patricia Tomaskovic, had this to say regarding the newest partnership: “GoCeilingMedallion.com is very delighted to be reaching out to the artistic community and having the ability to offer such beautiful and creative decorative items to our customers.”

Any size item or medallion can be ordered and custom decorated by Bella Medallions. They take great pride in their work creating wonderful works of art. In this hectic world today, many people are looking to ground themselves once again in tradition. Decorative ceiling moldings and medallions are seeing a rebirth of interest in the 21st century as people try to get back to basics.

Sunday, July 30, 2006

Whose Side Are You On?

Recently, we began gathering some information about crown molding corner blocks, with the sole purpose of adding them to our store in the near furture. During this whole process, a bit of a debate broke out in the office. We seem to be split fairly evenly between the two sides. There are those of us who love using corner blocks as a decorative accent and then we have the old guard who feels that the only way to do crown molding right is to hand fit each miter. So before we have to put on the gloves and take it out back we thought we would ask our friends for their input in the hopes of settling this dispute amicably. Here are the arguments.

For: There is no easier way to install crown molding than to use corner blocks. All the cuts are straight cuts so you never even have to change saw settings. A square cut molding has only one length (not a short and long measurement) which makes for less confusion. Finally, and maybe the best reason is that it is impossible to cut it upside down. And if you have ever cut crown, you’ve done this at least once.

Against: Crown molding installed with corner blocks will not look as good as properly cut miter joints. There is no way to hide the pattern repeat mismatch. Experienced builders and decorators know that it is almost impossible for the wall length to be an exact multiple of the pattern repeat. Most folks usually hide it in the inside corners. Then rather than having one joint at the corner, using corner blocks creates two joints near the corner. A majority of the time the pattern won’t match.

We really could use some input on this one. As far as who is on what side, I’ll give you one clue. The old in "old guard" describes our product manager way better than it does me. So tell us what you think. Write back now and help us settle this once and for all.

P.S. Don’t tell the"old guard", but I’ll take 10% off your order, right now, just for telling me I’m right. (Actually, I’ll give you the discount even if you don’t agree. But, you do have to log on and give us your opinion.). Do it now, because I don’t know how long I’ll be able to get away with an offer like this.

P.P.S. Just tell us: Pat sent me and your credit card will be refunded 10% upon receipt of your order.

Here’s the link: goceilingmedallion.com.

Happy decorating to you!

Tuesday, July 25, 2006

FOR IMMEDIATE RELEASE

GoCeilingMedallion.com Ends Relationship with Marie Ricci

Mesquite, NV July 21, 2006—Due to lack of customer interest, GoCeilingMedallion.com will no longer offer Marie Ricci products on any of our sites. “We had anticipated a greater response from our customers; however, that response has not been realized,” reports product manager Bob Tomaskovic.

Differences over marketing strategies, along with low margins, was also a major factor in this decision. “It is unfortunate that sometimes these differences are unable to be worked out and so we both felt that it was in our best interests to end the relationship,” states President of GoCeilingMedallion.com, Pat Tomaskovic.

GoCeilingMedallion.com has expressed assurance to their loyal and potential customers that they will continue to offer only the highest quality service and products. “Management is committed to providing service, value, and quality while expanding our product catalog. In fact, we have just added a line of frieze moldings that we are excited about and we think our customers will appreciate as well,” states Bob Tomaskovic.

###

Saturday, July 22, 2006

Welcome!

Welcome to GoCeilingMedallion.com's newest blog. We have developed this blog in order to post exclusively about crown molding. Crown molding is perhaps the most important architectural accent that is used to decorate any interior.

Designers, architects, craftsmen and homeowners will appreciate the old world charm as well as the timeless elegance afforded by using crown and cornice moldings. Use these exquisite moldings combined with chair or frieze moldings, ceiling medallions, corbels and other decorative accents to bring the beauty of the ancient Greek and Roman eras back to life.

As always, we welcome all comments and suggestions. We would also love to post your projects on our blogs. Send your before and after photos to mailto: mail to:info@goceilingmedallion.com and then watch our blogs for your photos. Also visit our other blog at http://goceiling.blogspot.com.

What Exactly Is Crown Molding?

Acanthus Leaf
Classic Egg and Dart

Composite

Regent


By definition, a molding is an ornamental piece of wood, metal, or plaster, used to decorate or outline something. It can be used on the interior or exterior of a home. Moldings frame walls, ceilings, windows, and door openings. Examples of moldings used to decorate with are baseboards, crown molding, and chair rails. Today, I want to talk exclusively about crown molding as a decorative architectural choice.

Crown molding, also referred to as crown moulding, or cornice, is probably the most important architectural accent used to detail any interior space. Most interior designers today would agree that every room can be improved with the use of crown molding. Crown molding smoothes the transition from the wall to the ceiling and does a wonderful job of defining the architectural style of a room. The size and style of crown molding used may vary widely, from a simple cove in a farmhouse kitchen to a large built-up cornice in a grand entry.

The initial use of a cornice in building design is anyone's guess. By the time the ancient Greeks had gained power, rules had already been created to define the use and design of crown molding. Originally, it was used as a structural element to help support the weight of the roof. It also served to keep water away from the building, thus protecting the lower walls and the foundation. However, the use of cornice as a decorative element was not considered any less important than it's more utilitarian functions. Most of the ornamental design patterns that you see on today's crown molding originated from the ancient Greeks. Egg and dart, dentil and acanthus leaf are the most obvious examples and these were used extensively in ancient times by both the Greeks and the Romans.

With the rebirth of the arts in the Renaissance period came a renewed interest in classical architecture as well. The rules of the classical orders were applied to the interior decoration of rooms. These were the rules of “3”. A column, the basis of classical architecture, is divided into 3 parts: base, shaft and capital. The base and the capital were then further divided into 3 parts and prescribed rules applied to the relationship and the proportion of these divisions as well. The same divisions that apply to a column are also applied to the wall. The wall is divided into the baseboard, the wall and a crown molding. The lower wall can be further divided into the base, dado and chair rail. Finally, the upper wall is divided into the picture molding, frieze and crown molding.

When beginning any decorative project to include several types of molding, it is recommended that you choose the style and size of crown molding first, as it is the most prominently displayed. Then select the rest of the moldings to match. Regarding the proper sizing of the crown molding, advice is abundant and many guidelines have been written. Most often the advice directs you to select the size of the crown molding based on the height of your ceiling. This may be a common approach to this aspect of the design process, though, as larger crown moldings have often been used to impressively decorate rooms of more modest proportions. What IS important is to properly scale the casings and other moldings to the size of the crown molding that you wish to use. When choosing crown molding for your interior, feel free to select the size and style that YOU like. Historically, larger crown moldings were more frequently used than what is recommended today by many interior designers. Change is anticipated as the current architectural renaissance continues and more designers and homeowners endeavor to add warmth to their homes and to personalize their interiors. So have a go at it and don’t be intimidated . You are limited only by your imagination.

Copyright 2005-2006 http://www.goceilingmedallion.com